Cooking… with ingredients. Real ones.

Berry Week – Part 3 – Jammin’ July 10, 2009

Filed under: Fruit,Miscellaneous — Patrick Sievert @ 3:12 pm

For as long as I can remember, one of the best things about going to visit grandma was the jar of homemade sand plum jelly.  When my grandpa was alive, he would pick the plums.  When he passed away (about 10 years ag0), that fell on us.  If we wanted jelly, we had to pick the plums.  Unfortunately, I no longer live in Oklahoma, where sand plums run amok.  So it’s no longer practical for me to pick plums to give to grandma (and I also live much farther away).  Which means no more homemade jelly…  unless…

I always thought that jelly/jam making was some magical process which you had to be at least 60 years old to understand.  I guess it’s because I’ve never known anyone to make it who wasn’t a grandma.  Come to think of it, I’ve never known anyone to make it who wasn’t MY grandma.  So I just assumed it was difficult, time consuming and mysterious.  Then I decided to look it up.

Pretty easy.  There’s some specialized equipment that you need if you’re going to preserve your jam (and unless you’re going to eat it all within a month, you should), but by and large, it’s pretty easy.  The first thing you’re going to need, of course, is jars (with two-piece lids).  I bought a dozen for $8.50.  Those jars will come with lids, but those lids can only be used once (assuming you’re going to preserve your jelly/jam).  (The rings can be used again, but the sealing part of the lid must be replaced.)  So if you have some old jars laying around (like I did), you’ll need to buy some more lids to go with them ($2 for a dozen).  Also, you’ll need a canning funnel.  This is a wide-mouthed funnel which perfectly fits into the mouth of a canning jar.  You could try to ladle your jam/jelly right in, but if you get any on the edges of the jar it won’t seal (or you’ll have to wipe it away, which can ruin your sterilization).  Also, a jar holder comes in verrrrrry handy.  You can do it without (I did), but I don’t recommend it.  Also, a lid lifter (a magnet on the end of a long stick) is handy, but I didn’t have any trouble picking up my lids with a pair of tongs.

You’re also going to need a big, deep pot.  You can also buy a canning kettle (which comes with a wire jar rack – which is handy), but they’re unnecessary as long as you have a deep enough stock pot to cover the jars.

Okay, let’s begin!

You’ll need:
enough berries to make 5 crushed cups (about 2.5 – 3 lbs)
1 package of fruit pectin
7 cups of sugar

Note: If you’re making anything other than blackberry jam, just follow the directions inside the pectin box.  They’ll tell you how much of everything you need. You may also need some lemon juice, depending on the acidity of whatever you’re making jam out of.

Now…  First thing’s first.  Wash everything. If it’s even going to think about coming in contact with your jam, wash it.  Jars, lids, tools, the works.  Meanwhile, in a pot big enough to hold everything (or two pots, in my case), boil enough water to cover all your jars/tools/etc.  Add everything but the lids (the sealing part) to the boiling water and boil for at least 10 minutes (longer at higher elevations).  When the water has boiled for that long, kill the heat.  Let the water cool down to 160° or so (5-10 minutes) and add your lids.  If you add the lids while the water is still boiling hot, it will ruin the sealing compound.

DSC00666 DSC00667

While your tools and jars are boiling, rise enough berries to make 5 crushed cups (about 8 cups of whole berries) and add them to a deep stockpot (you can use this same pot later on for preserving your jam, you’ll just have to wash it out first) over high heat.  With a potato masher, crush the berries very thoroughly.  When the berries have been thoroughly crushed, stir in one box of fruit pectin and bring mixture to a roaring boil over high heat.  When the berries are at a full boil, add in 7 cups of sugar.  Stir and quickly return to a boil and boil for 1 minute.  Remove from heat.

DSC00668

One at a time, remove your jars from their water bath and quickly ladle the mixture into them, using the canning funnel.  Without touching anything that contacts the fruit with your bare hands, add the lids to the jars and screw the rings on until they just begin to tighten.

DSC00669 DSC00670

Once all of your jars are filled, add them to your canning pot (if you’re using the same pot you just cooked the berries in, then wash it very quickly and fill it with the leftover water from your sterilization pot).  Place a tea towel in the bottom of the pot (so the jars don’t rattle) and align your jars in the pot.  Bring quickly to a full boil and boil for 10 minutes (longer at higher elevations).

DSC00672

Carefully remove the jars from the water and allow them to set, undisturbed, at room temperature for 12 to 24 hours.  If the jars are properly processed, the lids should “pop” down and remain in the down position until they are opened.  If any lid doesn’t “pop” down, then just eat that jar within a month or so and it should be fine…

Now, what to put it on…  That’s a post for another day (check back soon)…

DSC00673


Berry Week – Part 2 – Blackberry Pie July 9, 2009

Filed under: Dessert,Fruit — Patrick Sievert @ 5:14 pm

DSC00665

Sorry, all gone.

Just kidding…

Right after I graduated high school (all those years ago), I found a place that had a giant blackberry patch (wild blackberries, that is) and I picked a ton.  I decided I wanted to bake a pie.

This was before the internet was fast (and before I even thought of looking to the internet for a recipe), so I just winged it.  I bought a pie crust (well, a top and a bottom), filled it with blackberries and a little sugar, and baked it.  While the resulting “pie” tasted okay (just okay), it wasn’t much of a pie…  Was more of a pouch of juice.  So when I cut it open, it ran all over the place.  It was a big mess.  So I never made pie again.  Until this week.

I don’t have step-by-step pictures for this one, but that’s really okay…  You can get by on your own.

First things first, make two crusts (the following is for two crusts):

1 1/2 sticks butter, cut into chunks and chilled
1/4 cup shortening, chilled
2 1/2 c. all-purpose flour, plus a little extra
1 teaspoon salt
Ice water (we’ll get to how much to use later)

Put your butter and shortening in the freezer for at least 15 minutes before adding it to the flour.  While the fat’s in the freezer, combine your flour and salt.  Once the butter and shortening are cold, “cut” the butter into the flour using your fingertips or a fork (I like the fork).  Once the butter’s well cut in (the mixture should have some chunks and kind of look like coarse bread crumbs), then add the shortening in the same manner.  The reason we add the butter first rather than doing them together is that shortening has a lower melting point than butter.  We want this dough to remain as cold as possible.

At this point, go ahead and add your water.  It could take anywhere from 1 to 3 tablespoons.  Go slowly.  I recommend a spray bottle.  This not only forces you to add water slowly, it also evenly distributes the water over the whole dough.  When the dough is just wet enough to stick together without crumbling apart, divide it in half and wrap it in plastic wrap or put it in a ziploc bag (gallon size) and put it in the fridge for at least 1 hour.  The longer you leave it in the fridge, the easier it will be (I learned this the hard way).  The flour will soak up more of the moisture and will hold itself together better.

Meanwhile, let’s talk about your filling.  If you just combine blackberries and sugar (like I did back in 2001), your berries will bleed all over the place.  It’s ugly.  We need something that will hold those juices in.  That’s where cornstarch comes in (you could also use tapioca flour or some other starch, but cornstarch works just fine, and is readily available).  To 4 cups of berries (or enough to fill a pie), add 1 cup of sugar (brown sugar would be great!), whatever you want to flavor it with (cinnamon, nutmeg, ginger, clove, anise, etc…  it’s your call) and 3 tablespoons of cornstarch.  Combine this and set it aside until your dough is ready (make your filling about 10 minutes before your dough’s ready).

Back to the dough.  After an hour or more in the fridge, gently roll out each dough (if you kept it in a baggie, you can roll it out inside the baggie, then just cut the baggie away when you’re ready to put it in your pie plate – if you didn’t, then roll it out between sheets of parchment paper) until it is big enough to fit in your pie plate (duh).  Place one of your crusts in the pie plate and firmly press it down into all the corners.  Make sure you have enough to extend all the way to the edge of the pan.  If you’re short in a place or your dough breaks, no big deal, just patch it up.

Dump in your filling.  Spread it evenly around the pie plate.

Now for the top…  I know a “traditional” pie will simply have the second crust placed on top, with some slits cut in it.  In my opinion, with a juicy pie like blackberry, this is a recipe for disaster.  Not only will juice shoot up through the slits (making a mess), but even with those slits, you’re likely to get a big air pouch between your top crust and your filling when the filling settles.  The answer: a lattice crust.  Cut your second pie dough into 1″ strips and “weave” them over the top of your pie, leaving about 1″ squares between the strips of crust.  This will allow the filling to bubble gently without spewing a big mess and will ensure you don’t have a big pocket of air.

Bake at 375° on the 2nd lowest rack for about an hour, until the top is a nice golden brown.  Then, and this is important, let the pie cool for at least two hours! This will allow the starch to bind your filling.  Otherwise when you cut it, it’s going to run all over the place, turning your countertop, your clothes and your fingers purple.  And that’s no bueno.  If after two hours it’s not still warm (it might still be slightly warm), you can reheat it in the microwave for 15 seconds or so if you want a hot pie (which is a must, since you’re going to add ice cream to it, right?).

Follow these instructions, and when your pie is finally ready to eat, it will be almost gone before you remember to take a picture of it…  🙂


Berry Week – Part 1 – Blackberry Soda

Filed under: Drinks,Fruit — Patrick Sievert @ 1:15 am

Tuesday morning I went out to a local berry farm (Dozier’s Sta-N-Step Blueberry Farm) and picked about 3 lbs of blueberries and 6 lbs of blackberries. So… ever since then, it’s been Berry Week at the Sievert Houshold…

The first thing I made was some blackberry soda…

You’ll need:
4 cups of blackberries (preferrably fresh)
2 cups water
1/2 T lime juice (the juice of half a lime)
2 cups sugar

Also, have a colander lined with cheesecloth or a fine mesh strainer handy…
You might want some latex gloves too.

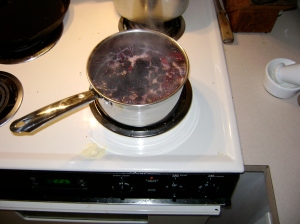
First things first, wash about 4 cups of blackberries and combine in a saucepan with 2 cups of water. Bring to a boil, reduce to a simmer, and let cook for about 15 minutes.

DSC00652

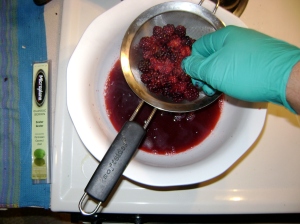
After 15 minutes, strain the berries through either a cheesecloth lined colander or a fine mesh strainer (cheesecloth is better, a strainer…  well, you’re more likely to have that laying around).  Let the berries cool for 10-15 minutes and squeeze as much juice out as you can.  Oh, make sure you’re wearing either something you don’t care about or at least something dark blue or black…  because things tend to get a little, um, blackberry…y.

DSC00653

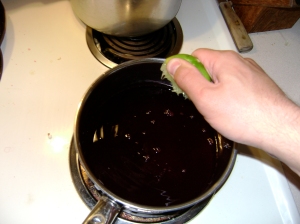
Return the juice to the pot (wiping out any seeds or leftover berries in the meanwhile) and add two cups of sugar and the juice of half of a lime.  Bring to a boil over medium-high heat, stirring constantly until the sugar is dissolved.

DSC00657

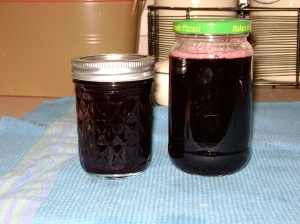
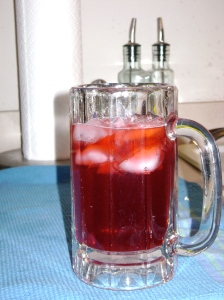
When the sugar is fully dissolved, let the syrup boil over medium-high heat for at least another minute.  Then pour into jars (or whatever you want to store it in).  When it’s cooled, combined 1/4 c. of blackberry syrup with 1 c. of seltzer water and enjoy…

DSC00658 DSC00659